

Most of us spend hours every week in virtual meetings, and a lot of what gets said there is worth keeping. A client explains exactly what they want, a teacher walks through a tricky lesson, or your team agrees on a plan.
If you record the meeting, nobody has to rely on memory or messy notes.
If you use Google Meet or Microsoft Teams, though, the Record button doesn’t always show up. That’s because both apps tie recording to your plan, and the free versions handle it very differently from what most people expect.
Don’t worry!
In this guide, I’ll show you how to record a Google Meet or Teams meeting step by step, which plans include recording, where your files are saved, and how to record for free when the built-in button isn’t available.
If you use Zoom instead, read our separate guide on how to record Zoom meetings on a free account.
So, let’s get started.
Can You Record Google Meet and Teams Meetings for Free?
Short answer: yes in Teams Free, but not in free Google Meet. Google Meet only lets you record with certain paid Google Workspace plans or a Google One plan with 2 TB or more of storage. Microsoft Teams Free, on the other hand, now has a built-in recorder.
According to What’s new in Microsoft Teams for personal use, you just select More options > Start recording, and the recording is stored in the cloud for up to 30 days. Work or school accounts need a business, enterprise, or education license with recording turned on by IT.
If the built-in recorder isn’t available to you, you can still record either app for free with screen recording software on your computer, like OBS Studio or the Windows Snipping Tool. I’ll cover that method later in this guide.
Now let’s go through each app step by step.
How to Record a Google Meet Meeting?
Google Meet records the active speaker, anything that’s presented, and, if you want, the captions. According to Google Meet Help, you can only start a recording from a computer or an Android device.
Who Can Record in Google Meet?
You can record a Google Meet meeting if your account is on one of these plans:
- Google Workspace: Business Standard, Business Plus, Enterprise Starter, Enterprise Standard, Enterprise Plus, Essentials, and Enterprise Essentials.
- Education: Education Plus (staff license) and the Teaching and Learning Upgrade.
- Personal accounts: Google One subscribers with 2 TB or more of storage, such as Google AI Plus or Google AI Pro, and Workspace Individual subscribers.
Business Starter and free personal Gmail accounts don’t include recording. Even on a supported plan, you need to be the host, a co-host, or someone from the host’s organization while Host Management is off. Also, if the host can’t record, nobody in that meeting can.
Steps to Record a Meeting in Google Meet
Follow these steps on your computer:
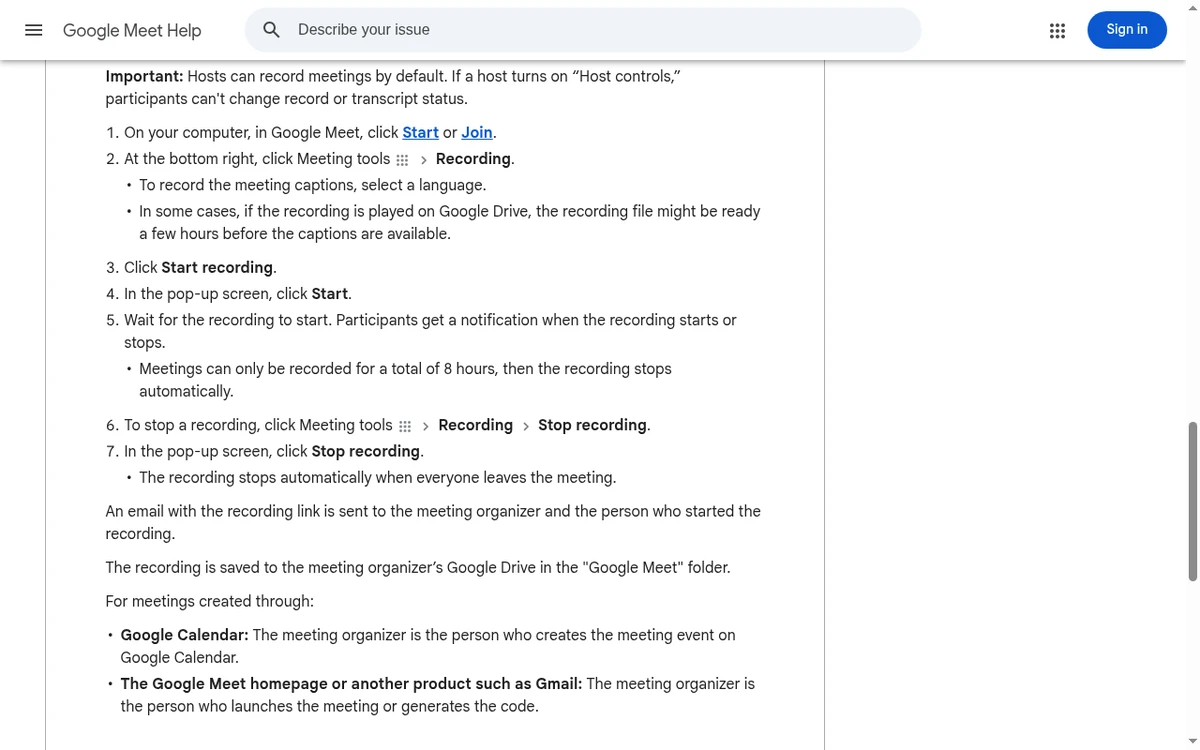
- Open Google Meet and start or join your meeting.
- At the bottom right, click Meeting tools, then click Recording.
- If you want captions in the recording, select Record captions and choose the language.
- Click Start recording, then click Start in the pop-up window.
- Wait a few seconds. Everyone in the call gets a notice that the meeting is being recorded.
- When you’re done, click Meeting tools > Recording > Stop recording, then confirm with Stop recording.
A recording can run for up to 8 hours, and it also stops automatically when everyone leaves the meeting. Another useful tip: if you only want to present, join the meeting first and then start your presentation, because you can’t record when you join only to present.
How to Record Google Meet Automatically?
If you always forget to press Record, you can set it to start on its own. When you create the meeting in Google Calendar, click Video call options, open Meeting records, and select Record the meeting. You can also turn on Transcribe the meeting or Take notes with Gemini from the same place.
The recording won’t begin until the host or a co-host joins from the web, and people who join will see a warning that recording is on.
Where Are Google Meet Recordings Saved?
Recordings go to the meeting organizer’s Google Drive, inside a folder called Google Meet, with a sub-folder for each meeting. Google also emails the link to the organizer and to the person who started the recording, and adds it to the Calendar event. Older recordings now sit in a folder named Legacy Meet Recordings inside that same Google Meet folder, and their old links still work.
Large recordings need some time to process, so you may see “Still processing” in Drive for a while. Also make sure the organizer has enough Drive storage, because Meet can’t save a recording when the Drive or the organization’s storage is full.
Can You Record Google Meet on a Phone?
Only on Android. If you’re on an Android phone with a supported plan, tap the More options menu during the call to find the recording option. On an iPhone or iPad, you can’t start a Meet recording, and people joining from the mobile app only get a notice that recording has started or stopped. If you need to start or join from your phone, our Google Meet start and join guide covers the basics.
How to Record a Microsoft Teams Meeting?
Teams has two different versions, and recording works differently in each one. First, check which one you’re using: Teams for personal use (the free app you sign in to with a personal Microsoft account) or Teams for work or school.
Recording in Teams Free and Teams for Personal Use
Good news here. The free version of Teams lets you hold 60-minute group meetings with up to 100 people, and Microsoft has now added built-in meeting and call recording to it. According to Microsoft’s What’s new in Microsoft Teams for personal use page, recordings are stored in the cloud for up to 30 days, and no paid subscription is listed for this feature. If you want to see everything the free plan does include, read our post on Microsoft Teams free plan features and limitations, or follow our step-by-step guide to using Microsoft Teams Free for video meetings.
Here’s how to record a meeting in Teams Free:
- Start or join the meeting in Teams on your computer, the web, or your phone.
- In the meeting controls, select More options (the three dots).
- Select Start recording.
- Choose the spoken language of the meeting, so the recording gets accurate captions, and confirm. Everyone in the meeting is notified.
- To stop, select More actions > Stop recording, then confirm.
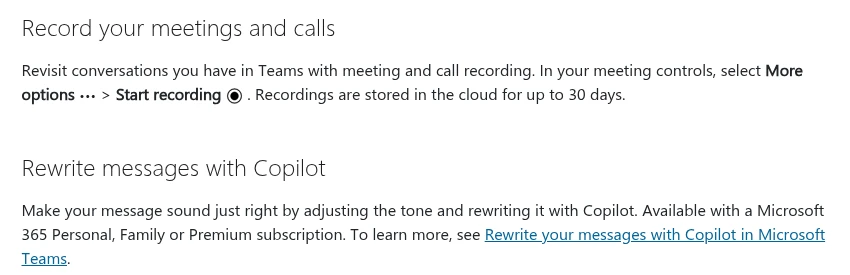
When you stop, the recording is processed and appears in the meeting chat. As Microsoft explains, it expires 30 days after it’s saved, and watching it doesn’t reset that date. So select Download below the recording in the chat if you want to keep it longer. Only the person who started the recording can delete it, and a recording shows up to four people’s video at once.
Tip: If you don’t see Start recording yet, update the Teams app and check that you’re signed in with your personal Microsoft account. New Teams features can take time to reach every account, and some older Microsoft help pages still describe recording as a Microsoft 365 subscriber feature.
Recording in Teams for Work or School
With a work or school account, you need a license such as Microsoft 365 Business Basic, Business Standard, Business Premium, Office 365 E1, E3, E5, or A1, A3, A5, and your IT admin must allow recording. Guests and people from other organizations can’t record. Here are the steps from Microsoft Support:
- Start or join the meeting from the Teams desktop app.
- In the meeting controls, select More actions > Record.
- Choose your spoken language and what you want to record. To capture sound only, pick Audio only from the Choose what to record menu.
- Select Confirm.
- To stop, select More actions > Recording, and choose to stop the recording.
Only one person can record at a time, and the recording keeps going even if that person leaves. If someone forgets to hang up, Teams ends the file and starts a new one every four hours until the last person leaves.
Where Are Teams Recordings Saved?
For work and school meetings, recordings are saved in the organizer’s OneDrive, or in SharePoint for channel meetings, and a link shows up in the meeting chat. You can also open the meeting in your Teams calendar to find it. Your admin sets an expiration date, but organizers can change it or choose Remove expiration from the recording’s player page.
Keep in mind that Teams recordings won’t capture:
- More than four people’s video at once.
- Whiteboards and annotations.
- Shared notes and content shared through an app.
- Videos or animations embedded in PowerPoint Live slides.
How to Record Google Meet or Teams for Free with Screen Recording Software?
If your plan doesn’t include recording, or you’re only a participant, you can record your own screen instead. This works for both apps, it’s free, and the file stays on your computer. Before you hit record, though, always tell everyone in the call and get their permission.
OBS Studio (Windows, macOS, and Linux)
OBS Studio is free, open-source, and has no time limit or watermark. It’s my top pick because it captures your screen, your microphone, and your computer’s sound in one file.
- Download and install OBS Studio, then open it.
- Under Sources, click + and add Display Capture (Windows) or macOS Screen Capture (Mac).
- In the Audio Mixer, check that Desktop Audio and Mic/Aux both move when you test them.
- Click Start Recording when the meeting begins and Stop Recording when it ends.
- Open File > Show Recordings to find the video.
Windows Snipping Tool or Xbox Game Bar
On Windows 11, open the Snipping Tool, select Record, then New (or press Windows + Shift + R), and drag over the meeting window. In the small toolbar, turn on the system audio and microphone buttons, then select Start. You can also press Windows + G to open the Xbox Game Bar and record the meeting app window, which is handy for quick recordings.
macOS Screenshot Toolbar or QuickTime Player
On a Mac, press Shift + Command + 5, choose Record Entire Screen or Record Selected Portion, and pick your microphone under Options. The built-in recorder doesn’t capture the other people’s voices coming from your Mac, though, so for meetings I recommend OBS Studio instead.
Google Meet or Teams Recording Not Showing? Here’s Why
If the Record option is missing or your file is nowhere to be found, check this table first:
| Problem | Likely reason | What to do |
|---|---|---|
| No Recording option in Meet | Free Gmail, Business Starter, or an iPhone | Use a supported plan on a computer or Android, or record your screen |
| Recording greyed out in Meet | Host controls are on, or the host can’t record | Ask the host or a co-host to record |
| Meet recording can’t start | Drive storage is full | Free up space in Google Drive |
| No Start recording in Teams Free | Old app version, or the feature hasn’t reached your account yet | Update Teams, sign in with your personal account, or record your screen |
| Record missing in Teams for work | Recording policy is off or you’re a guest | Ask your IT admin or the organizer |
| Teams recording disappeared | It expired | Download personal recordings within 30 days |
For broader issues, like a frozen screen or no sound during the call itself, see our guide on how to fix common video call problems.
Is It Legal to Record a Google Meet or Teams Meeting?
Both apps show a recording notice to everyone, but that notice isn’t the same as consent. Recording laws change from country to country, and in some places every person in the call must agree to be recorded. So my advice is simple: say it out loud at the start, for example, “Is everyone okay if I record this meeting?”, and stop if anyone objects.
Also be careful with what you do with the file afterwards. Share it only with people who need it, and delete it when you no longer need it. If you’re worried about AI tools joining and recording your calls without asking, our guide on how to stop AI notetaker bots from joining your meetings shows you how to block them.
Tips for Better Meeting Recordings
- Test first. Do a 30-second test recording before an important meeting, and check that both the picture and sound are there.
- Use a headset. A headset stops echo and makes your voice much clearer. Our camera and microphone testing guide helps you check your setup in a minute.
- Name your files clearly. For example, “2026-Client-Kickoff-Recording” is much easier to find than “Meeting (3)”.
- Add captions. In Meet, record captions so people can follow along without sound.
- Turn recordings into notes. Once you have a recording, you can create a transcript and action items from it. Read our guide on turning meeting recordings into transcripts and notes.
Conclusion:
Hopefully, this guide has given you a clear idea of how to record a Google Meet or Teams meeting and what you can do for free.
To sum up, Google Meet records straight to Google Drive on most paid Workspace plans and on Google One plans with 2 TB or more. Teams Free now records for free with More options > Start recording and keeps recordings in the cloud for up to 30 days, while Teams for work saves them to OneDrive or SharePoint. And if your plan doesn’t include recording, OBS Studio or the Snipping Tool will do the job for free.
So, which app do you record your meetings with, is it Google Meet or Microsoft Teams? Please let us know by commenting below and giving this post a star rating. If you have any questions or suggestions, feel free to contact us. We’ll be happy to hear your thoughts, thanks.