
You have something useful to teach, a product to show, or a community to bring together.
A webinar is a great way to do it, but the moment you look at webinar software, you see monthly fees that are hard to justify for your first event.
Here’s the good news. You can host a real, professional-looking webinar without paying anything. You just need to pick the right free tool, set it up properly, and plan the event well.
So, how do you do it? Don’t worry!
In this guide, we’ll show you how to host a free webinar step by step.
You’ll learn what makes a webinar different from a normal meeting, which free options work best in Zoom, Google Meet, Microsoft Teams, and YouTube Live, and exactly how to plan, promote, run, and follow up on your event.
So, let’s get started.
What Is a Webinar?
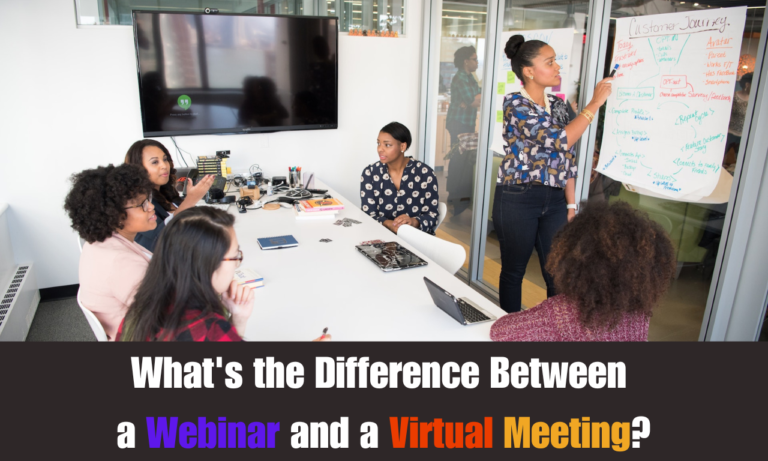
A webinar is an online presentation where one or a few hosts speak to an audience. Unlike a regular video meeting, attendees mostly watch and listen. They usually interact through chat, questions, polls, and reactions instead of turning on their cameras and microphones.
We explain the difference in more detail in our article on the difference between a webinar and a virtual meeting. Here’s the short version:
Dedicated webinar tools like Zoom Webinars, which can scale to as many as 1 million view-only attendees, are paid products. But for small and medium events, you can get very close to the webinar experience with free tools.
What Are the Best Free Ways to Host a Webinar?
Here’s how the main free options compare:
| Option | Audience limit | Time limit | Best for |
|---|---|---|---|
| Zoom Basic meeting | 100 participants | 40 minutes | Short, interactive sessions |
| Google Meet (free) | 100 participants | 60 minutes for 3 or more people | Simple sessions with no app to install |
| Microsoft Teams Free | 100 participants | 60 minutes | Groups that already use Teams |
| YouTube Live | No fixed viewer limit | Long streams supported | Public events and large audiences |
Option 1: Zoom Basic Meeting
Zoom’s free Basic plan doesn’t include Zoom Webinars, registration, polls, or Q&A, but you can run a webinar-style meeting with up to 100 people for 40 minutes. You still get a waiting room, passcodes, local recording, and automated captions. Check the current limits on Zoom pricing.
Option 2: Google Meet
Free Google Meet works right in the browser, so attendees don’t need to install anything. Group calls with three or more people last up to 60 minutes, with up to 100 participants.
Option 3: Microsoft Teams Free
Teams Free allows group meetings of up to 60 minutes with up to 100 participants. Real Teams webinars with registration pages are part of Microsoft 365 business plans, not Teams Free.
Option 4: YouTube Live
For public events, YouTube Live is the most powerful free option. Anyone with the link can watch, there’s no fixed audience limit like the 100-person cap of free meeting plans, and the stream can stay on your channel afterwards. To live stream on YouTube, your channel must be verified, you need to be at least 16, and you can’t have any live streaming restrictions in the past 90 days.
Note: The downside of YouTube Live is that viewers can’t talk to you directly. They interact only through live chat.
Bonus: Google Meet to YouTube (Low Cost)
If you want the best of both, Google Meet can live stream a meeting to YouTube. Your speakers join a normal Meet call, and your audience watches on YouTube. This needs a Google One plan with 2 TB or more storage, Google Workspace Individual, or an eligible Workspace edition, so it isn’t free, but the 2 TB plan is $9.99 per month in the US on the Google One plans page.
How to Host a Free Webinar Step by Step
Whichever tool you choose, the process is the same. Follow these steps and your first webinar will feel organized and professional.
Step 1: Define Your Goal and Audience
Start with one clear goal. Do you want to teach a skill, launch a product, train a team, or answer customer questions? Then, think about who will attend and what they need to leave with. This decides your topic, length, and format.
Step 2: Choose Your Free Platform
Use this simple rule:
- Under 100 people and under 40 minutes: Zoom Basic.
- Under 100 people and up to 60 minutes: Google Meet or Teams Free.
- Large or public audience: YouTube Live.
- Panel of speakers plus a big audience: Google Meet streamed to YouTube (needs a Google One 2 TB plan).
Step 3: Pick a Date, Time, and Length
Choose a time that suits your audience’s time zone. Mid-week, mid-day slots usually work well for professional audiences. Keep the session short enough to fit the free time limit, and plan for about 10 minutes of Q&A at the end.
Step 4: Create the Event and Invite Link
Schedule the meeting or live stream and copy the join link. If you need help with this part, read our guide on how to schedule a video meeting and send the invite.
Since free plans don’t have registration pages, use a free form tool to collect names and emails, and then send the link to people who sign up.
Step 5: Prepare Your Slides and Content
Use large text, one idea per slide, and plenty of visuals. Practice switching between slides and demos. Our guide on how to present slides in a video meeting without awkward moments has more presenting tips.
Step 6: Set Up Your Equipment
A clear voice matters more than a perfect picture. Use a headset or USB microphone, face a window or a soft light, and use a wired internet connection if you can. If you want to upgrade, check our list of webcams for video conferencing.
Step 7: Configure Your Settings
Before the event, set your meeting to behave like a webinar:
- Mute attendees when they join so background noise doesn’t interrupt you.
- Allow only the host to share the screen.
- Turn on the waiting room or lobby so you control who enters.
- Add a co-host to watch the chat and remove anyone who causes trouble.
- Turn on captions to make the session easier to follow.
For more ways to protect your event, read how to keep your online meetings secure from uninvited guests and fake links.
Step 8: Promote Your Webinar
Share the sign-up link by email, on social media, in relevant communities, and on your website. Send a reminder one day before and another one an hour before the start. Reminders make a big difference to how many people actually show up.
Step 9: Do a Rehearsal
Run a short test with a friend or colleague a day before. Check your audio, screen sharing, slides, and any videos you plan to play. On YouTube, start your stream as unlisted or private first so you can test it.
Step 10: Go Live and Engage Your Audience
Join 15 minutes early. Start on time, welcome people, explain how to ask questions, and then deliver your content. Ask questions in the chat every few minutes to keep people involved, and leave time at the end for Q&A.
Step 11: Follow Up
Send a thank-you email with the slides, the recording, and a clear next step. If you’re on Zoom Basic, you can record locally on your computer. Our guide on how to record Zoom meetings on a free account shows you how.
How to Start a Free Webinar on YouTube Live
If you choose YouTube Live, here’s how to get started:
- Verify your YouTube channel and turn on live streaming. The first approval can take up to 24 hours, so do this well before your event.
- On a computer, go to YouTube Studio.
- At the top right, click Create > Go live to open the Live Control Room.
- Choose to stream with your webcam, or with an encoder if you want overlays and multiple cameras.
- Add a title, description, and visibility setting, and schedule the stream if you want to share the link in advance.
- Share the stream link with your audience and go live at the scheduled time.
How to Stream a Google Meet Webinar to YouTube
With an eligible Google plan, follow these steps on a computer:
- Join the Meet call with the same email you use for your YouTube channel.
- At the bottom right, click Meeting tools.
- Select Live streaming > Stream with YouTube.
- Choose your channel, then click Select or create an event. For a new event, enter the title, privacy level, and caption language.
- Review YouTube’s Terms of Service and click Start Streaming.
- Copy the Live stream link and share it with your audience.
- When you’re done, click Stop Streaming.
Note: You can’t pause a YouTube stream started from Meet. You can end it and start a new one from the same meeting.
When Should You Upgrade to a Paid Webinar Tool?
Free tools are perfect for your first events. But you’ll probably want a paid option when you regularly need registration pages, polls, Q&A, more than 100 interactive attendees, or sessions longer than an hour.
Here are the main paid paths:
- Zoom Webinars: Registration, Q&A, polls, and audiences that can scale up to 1 million view-only attendees.
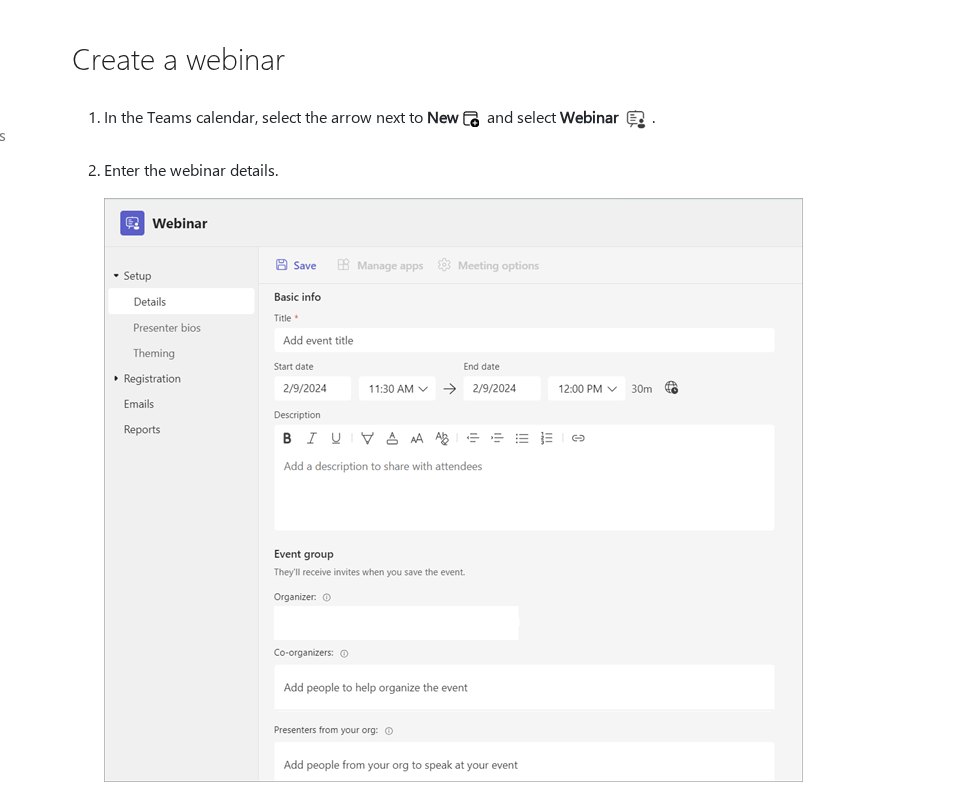
- Microsoft Teams webinars and town halls: Included with Microsoft 365 business plans. In the Teams calendar, you select the arrow next to New and choose Webinar, as Microsoft’s webinar scheduling guide explains. According to the Teams events comparison, registration works for events up to 1,000 attendees, and town halls can reach 10,000 view-only attendees.
- Google Workspace: Business Standard and higher add features like polls, Q&A, and recording in Meet.
Common Webinar Mistakes to Avoid
- Ignoring the time limit: On a free plan, the meeting ends when the limit is reached. Plan your agenda to finish early.
- Skipping the rehearsal: Most technical problems show up in the test, not in the content.
- Posting the link publicly: On meeting tools, a public link can invite trolls. Send it only to people who sign up.
- Reading slides word for word: Your audience can read. Tell stories and give examples instead.
- Forgetting the call to action: Always tell people what to do next, like download a guide, book a call, or join your next session.
Conclusion:
Hopefully, this guide has helped you learn how to host a free webinar step by step.
In short, use a free Zoom, Google Meet, or Teams meeting for small interactive sessions, and YouTube Live for larger public events. Then, define your goal, prepare clear slides, set up your audio, lock down your settings, promote the event, rehearse, and follow up with the recording.
I recommend starting small with a 30-minute session for a group you already know. Once you’re comfortable and your audience grows, you can move to a paid webinar tool with registration and polls.
Are you planning your first webinar? Please let us know by commenting below and giving us a star rating to rate this post. And if you have any questions or suggestions, feel free to contact us. We’ll be happy to hear your thoughts, thanks.